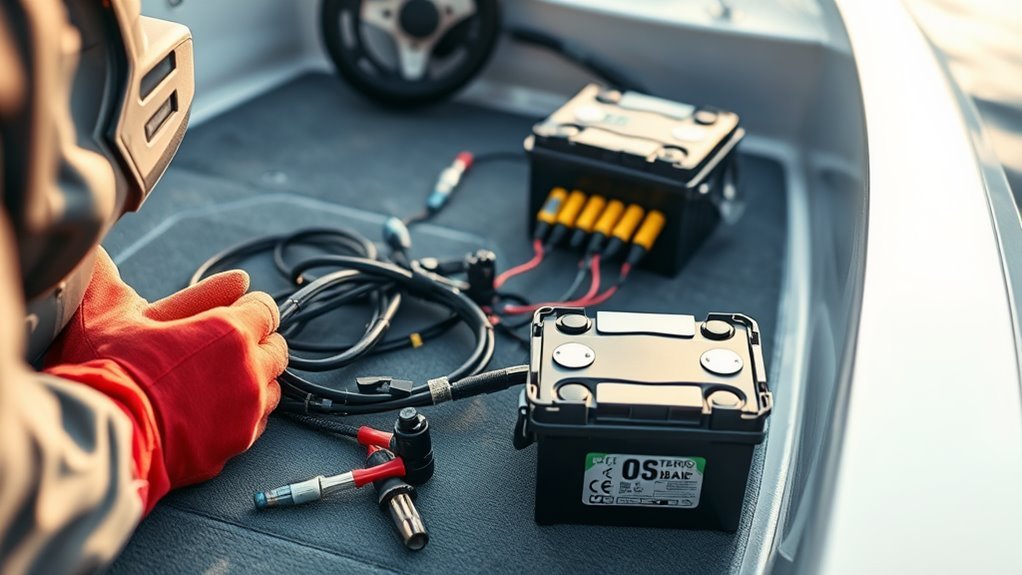
Installing a 24-volt trolling motor system requires careful attention to detail and basic electrical knowledge. As a boat mechanic who’s installed hundreds of these systems, I’ll break down the exact process that keeps motors running reliably for years.
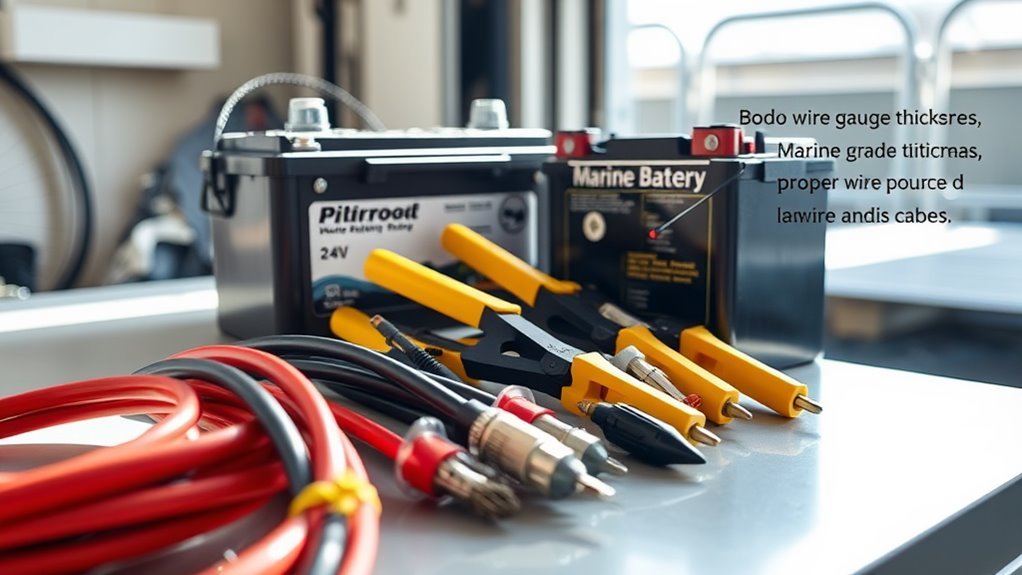
The foundation starts with selecting two 12-volt deep cycle marine batteries rated for trolling motor use. These batteries connect in series to create the needed 24 volts. I always recommend AGM or lithium batteries for their durability and maintenance-free operation.
The wiring sequence is straightforward:
- Connect the negative terminal of battery #1 to the positive terminal of battery #2
- Run the motor’s positive lead to the open positive terminal on battery #1
- Connect the motor’s negative lead to the open negative terminal on battery #2
- Install a circuit breaker or fuse between the motor and battery positive connection
Pro tip: Use marine-grade tinned copper wire sized appropriately for your motor’s amp draw. For most 24V trolling motors, 6 AWG wire works perfectly. Always secure connections with heat-shrink terminals and waterproof all contact points.
Double-check your connections before testing – reverse polarity can damage your motor instantly. After installation, coat terminal connections with dielectric grease to prevent corrosion and ensure reliable operation season after season.
“A properly wired trolling motor is your most reliable fishing partner. Take time with the installation, and it’ll serve you for countless trips.” – Brett K.
Essential Tools and Components Required
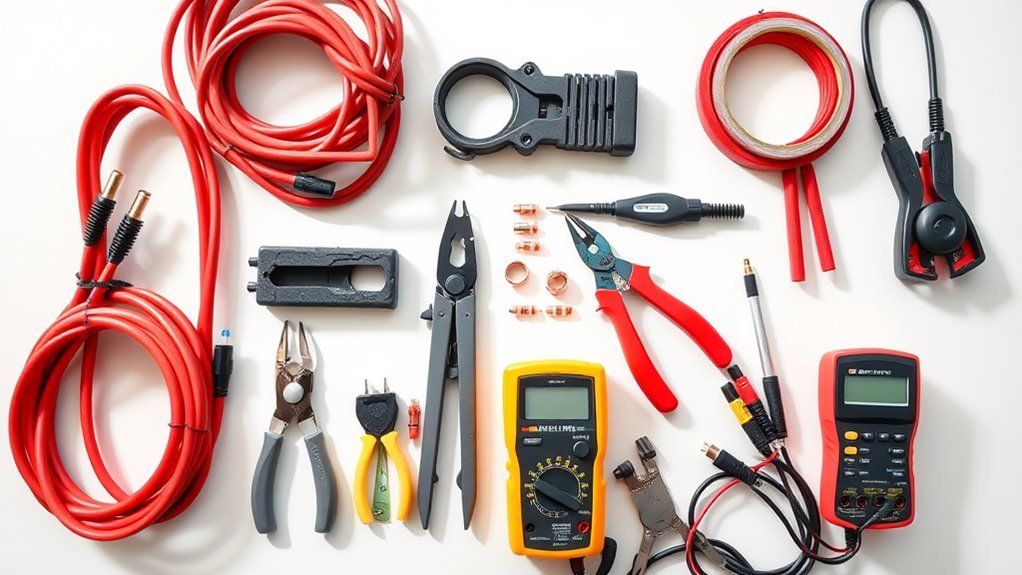
The proper wiring of a 24V trolling motor starts with assembling the right arsenal of tools and components.
For MOTOR WIRING AND BATTERY setup, we’ll need two 12-volt deep cycle batteries rated at 110-ampere hours or higher – don’t skimp here, folks.
Grab your wire cutter/stripper and a reliable crimping tool – they’re non-negotiable for clean, secure connections.
You’ll also need 6 or 8 gauge marine-grade wire to handle the current load without voltage drop. Trust us, thinner wire won’t cut it.
Don’t forget a 60-amp circuit breaker for each ungrounded conductor. It’s your insurance policy against costly burnouts.
Round out your toolkit with proper terminal connectors and marine-grade electrical tape.
Remember: salt water and exposed wires don’t play nice together. Additionally, ensure the use of proper battery placement to maintain safety and performance during your wiring process.
Battery Selection and Setup
Now that you’ve got your tools ready, let’s power up your setup properly.
You’ll need two 12-volt deep cycle marine batteries – and they must be identical twins in type, size, and age. Don’t skimp here – get at least 110-ampere hour rated batteries for reliable performance.
We’ll connect these batteries in series to achieve the 24 volts your trolling motor craves. Remember: matching batteries aren’t just a suggestion – it’s critical for system balance and longevity.
Install a 60-amp (minimum) circuit breaker near your battery setup to protect your investment from overcurrent disasters.
Got lead-acid batteries? They’re demanding creatures. Recharge them within 12-24 hours after use, or you’ll be shopping for replacements sooner than you’d like. Regular recharging and maintenance practices pay off.
Trust us – proper battery maintenance pays off.
Wiring Safety Precautions
Before diving into any wiring work, you’ll need to embrace some non-negotiable safety protocols – because electrical shorts don’t offer second chances.
Let’s knock out these critical safety steps:
First, we’ll cover all positive battery terminals with protective shields or electrical tape – no exceptions.
We’re also going to religiously inspect those connections for any hint of corrosion or looseness.
Remember, metal and battery terminals are mortal enemies, so keep them far apart.
Never, ever let positive and negative terminals touch – that’s a recipe for disaster we don’t want to cook up.
And here’s a non-negotiable rule: Always disconnect the trolling motor from the battery during charging or storage.
These aren’t just suggestions – they’re your electrical safety lifeline. Regular maintenance checks of connections can help prevent issues related to corrosion and ensure safe operation.
Step-by-Step Series Connection Guide
Since we’re dealing with a 24V system, let’s wire those batteries in series like pros – it’s time for some voltage-doubling magic. For trolling motor wiring done right, we’ll need matching 12V batteries and proper connections. Let’s make this happen with military precision.
- Connect the positive terminal of battery #1 to the negative terminal of battery #2 using appropriate gauge wire – this is your series connection backbone.
- Hook the negative terminal of battery #1 to your trolling motor’s negative lead.
- Connect the positive terminal of battery #2 to your trolling motor’s positive lead.
- Install that 60A circuit breaker right at the positive terminal of battery #2 – it’s your system’s lifeline against electrical gremlins.
Remember: batteries wired in series means double voltage, so check those connections twice before powering up. It’s also important to choose deep cycle batteries to ensure long-lasting performance and efficiency for your trolling motor system.
Circuit Protection and Breaker Installation
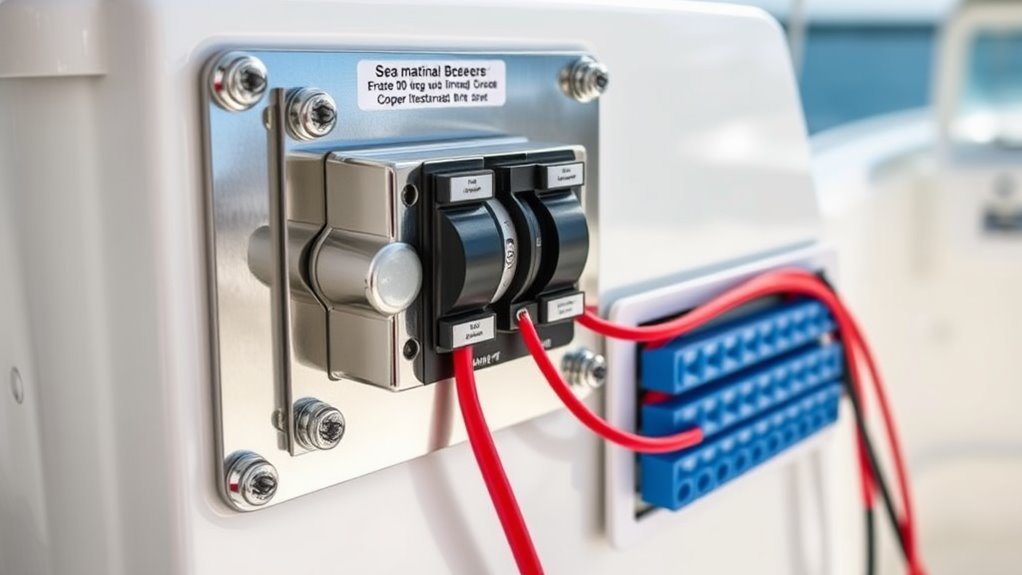
Those battery connections won’t mean a thing without proper circuit protection – let’s lock down your electrical system’s safety net.
We’ll need a 60-amp circuit breaker or fuse to shield your trolling motor from power surges that could fry expensive components.
Mount the breaker within 12 inches of your marine battery – any farther and you’re compromising protection.
Here’s the non-negotiable part: install it on the positive lead before it reaches your motor. Trust us, this placement matters.
Double-check that breaker rating matches your motor’s specs. Running mismatched equipment is asking for trouble.
And don’t just install it and forget it – regular inspections for wear and damage will keep your system running safely.
Consider this breaker your trolling motor’s insurance policy. Regular inspection prevents corrosion and oxidation, ensuring optimal performance and safety.
Testing and Verification Process
Proper voltage testing stands as your final defense against electrical gremlins.
Let’s walk through the essential circuit verification steps to guarantee your 24V trolling motor system is ready for action.
- Measure across the entire battery series – positive terminal of the last battery to negative of the first – you should see 24 volts.
- Connect your multimeter’s negative lead to the negative bus, then test voltage points throughout the circuit.
- Check voltage at the motor cable by testing from the positive terminal to negative bus – confirm it’s receiving full 24 volts.
- Inspect every connection point for security and corrosion, then re-test voltage after any adjustments.
Remember: Sloppy testing leads to troubleshooting nightmares. Additionally, ensure your battery setup is aligned with thrust requirements to optimize performance and efficiency.
Take your time, verify twice, and you’ll catch problems before they leave you stranded.
Maintenance and Troubleshooting Tips
While a 24V trolling motor system is built tough, it won’t stay that way without regular attention to maintenance.
When following proper Trolling Motor Wiring guides, we’ve learned that regular inspection is vital. Let’s check those battery connections monthly – corrosion’s your enemy here, and tight connections are your friends.
Don’t skip voltage monitoring – it’s a dead-simple way to catch weak batteries before they leave you stranded. Keep those terminals clean and check your circuit breakers for continuity.
If your motor’s acting up, we’ll start with the basics: verify proper wiring connections and voltage compatibility. Trust us, most issues stem from neglected maintenance. A quick inspection routine saves hours of troubleshooting later.
Additionally, routine checks enhance motor longevity and efficiency, ensuring your system remains reliable on the water.
Consider this your essential Wiring Guide to keeping that 24V system humming.
Frequently Asked Questions
How to Wire a 24 Volt Trolling Motor System?
Let’s connect two 12-volt batteries in series for peak trolling motor performance, linking the first battery’s positive to the second’s negative. Don’t forget regular battery maintenance and a 60-amp circuit breaker.
Does a 24 Volt Trolling Motor Need Two Batteries?
Like two peas in a pod, your 24-volt trolling motor absolutely needs two 12-volt batteries. We’ll want matching battery types and proper wiring safety to keep everything running smoothly.
How to Wire 24 Volt With Two Batteries?
Let’s connect our two batteries in series configuration by linking positive terminal of first battery to negative of second, then connect trolling motor leads to remaining negative and positive terminals.
How Long Will a 24V Trolling Motor Battery Run?
We’ll typically get 5-6 hours of runtime with a 110Ah battery capacity at normal speeds, but this can vary based on our power settings and conditions. Higher speeds reduce runtime estimation considerably.